Getting Started
Choose your path
OpenAVMKit can be used three ways. Pick the one that fits, then follow the corresponding install option below.
- Notebook user — you want to run the pipeline notebooks on a locality (assess, clean, model, evaluate). Most users start here. After install, do the smoke test below to confirm everything works, then jump to the tutorial for an end-to-end walkthrough of building a jurisdiction from your own data.
- Python library user — you want to import
openavmkitmodules into your own Python code (analysis scripts, custom pipelines, dashboards). After install, see The Basics → Code modules, then the API reference for what's available. - Contributor / coding agent — you want to extend OpenAVMKit. Install from Git (option 2 below), then read AGENTS.md at the repo root for conventions and gotchas, plus CONTRIBUTING.md for the PR workflow.
Option 1 - Install from PyPI
(recommended for most users)
You can install the latest stable release directly from PyPI without cloning the repository:
pip install openavmkit
Option 2 - Install from Git
Setting up Python Environment
Follow these steps to install and set up OpenAVMKit on your local environment.
1. Clone the Repository
Start by cloning the repository to your local machine:
(This command is the same on Windows, MacOS, and Linux):
git clone https://github.com/larsiusprime/openavmkit.git
cd openavmkit
This command will clone the repository to your local machine, store it under a folder named openavmkit/, and then navigate to that folder.
2. Install Python
If you don't have Python on your machine, you'll need to install it.
OpenAVMKit requires Python 3.11 or newer; 3.11 and 3.12 are tested.
If you already have Python installed, but you're not sure which version of Python you have installed, you can check by running this command:
python --version
If you have Python installed, you should see the version number printed to the console.
If you don't have Python installed, you can get a supported version here:
If you have the wrong version of Python installed, you can download the correct version from one of the links above, and then install it. Be very careful to make sure that the new version of Python is available in your PATH. (If you don't know what the means, here is a handy tutorial on the subject).
3. Set up a Virtual Environment
It's a good practice to create a virtual environment* to isolate your Python dependencies. Here's how you can set it up using venv, which is Python's built-in tool ("venv" for "virtual environment"):
MacOS/Linux:
python -m venv venv
source venv/bin/activate
Windows:
python -m venv venv
venv\Scripts\activate
*On a typical computer, there will be other programs that are using other versions of python and/or have their own conflicting versions of libraries that openavmkit might also need to use. To keep openavmkit from conflicting with your existing setup, we set up a 'virtual environment,' which is like a special bubble that is localized just to openavmkit. In this way openavmkit gets to use exactly the stuff it needs without messing with whatever else is already on your computer.
Let me explain a little bit what's going on here. The first command, python -m venv venv, creates the virtual environment. You only have to run that once. The second command, the bit that ends with activate, is what actually starts the virtual environment. You have to run that every time you open a new terminal window or tab and want to work on openavmkit.
You can tell that you are in the virtual environment, because your command prompt will change to show the name of the virtual environment, which in this case is venv. Here's how your command prompt will look inside and outside the virtual environment.
Outside the virtual environment:
MacOS/Linux:
/path/to/openavmkit$
Windows:
C:\path\to\openavmkit>
Inside the virtual environment:
MacOS/Linux:
(venv) /path/to/openavmkit$
Windows:
(venv) C:\path\to\openavmkit>
Take careful note that you are actually inside the virtual environment when running the following commands.
When you are done working on openavmkit and want to leave the virtual environment, you can run this command:
deactivate
And you will return to your normal command prompt.
4. Install dependencies
Install all third-party dependencies in one shot:
pip install -r requirements.txt
5. Install openavmkit
If you want to import and use the code modules directly, you must install the library.
First, make sure you've followed the above steps.
Then, in your command line environment, make sure you are in the top level of the openavmkit/ directory. That is the same directory which contains the setup.py file.
Install the library from the checked-out source (editable mode is recommended for development):
pip install -e .
The "." in that command is a special symbol that refers to the current directory. So when you run pip install ., you are telling pip to install the library contained in the current directory. That's why it's important to make sure you're in the right directory when you run this command!
Running Jupyter notebooks
Jupyter is a popular tool for running Python code interactively. We've included a few Jupyter notebooks in the notebooks/ directory that demonstrate how to use openavmkit to perform common tasks.
To use the Jupyter notebooks, you'll first need to install Jupyter:
pip install jupyter
With Jupyter installed, you can start the Jupyter notebook server* by running this command:
jupyter notebook
*What's a "Jupyter notebook server?" Well, a "server" is any program that talks to other programs over a network. In this case the "network" is just your own computer, and the "other program" is your web browser. When you run jupyter notebook, you're starting a server that talks to your web browser, and as long as it is running you can use your web browser to interact with the Jupyter notebook interface.
When you run jupyter notebook, it will open a new tab in your web browser that shows a list of files in the current directory. You can navigate to the notebooks/ directory and open any of the notebooks to start running the code.
Running tests
To ensure everything is working properly, you can run the test suite. This will execute all unit tests from the tests/ directory.
Run the tests using pytest:
pytest
This will run all the unit tests and provide feedback on any errors or failed tests.
Smoke test with sample data
Okay, you've got the library installed, and you have notebooks running. Before tackling your own jurisdiction, do this 10–15 minute smoke test to confirm everything works and to see what successful output looks like at each stage.
First, you need to download an example dataset to work with. The Center for Land Economics has provided one based off of public domain data posted freely on local government websites. Let's download it.
Here's a quick high level explanation:
- The example data is stored on Azure, Microsoft's cloud data service.
- You'll set up a settings file locally that points to our public data repository on Azure
- OpenAVMKit will read that file and use it to download the public example dataset for you
Crucially, you do NOT have to create an account or login credentials to connect to our public data repository.
Let's go through the steps one by one.
1. Create locality folder and cloud.json file
- Navigate to the directory you installed openavmkit to and find the
notebooks/pipeline/datapath. - Create a folder with the name
us-nc-guilford - Inside that folder, create a new text file, name it
cloud.json
This folder will eventually contain all the data for the test locality. The cloud.json tells OpenAVMKit how to connect to the cloud service.
2. Fill out cloud.json
Open cloud.json in a text editor and paste the following text into it exactly:
{
    "type": "azure",
    "azure_storage_container_url": "https://landeconomics.blob.core.windows.net/localities-public"
}
We'll explain the full specification for this file later, but you don't need to worry about that just to download the expample dateset. For now just do the above.
3. Downloading the data
Go ahead and launch the jupyter environment, and navigate to the first notebook.
In the second cell, edit it so that it reads locality = "us-nc-guilford"
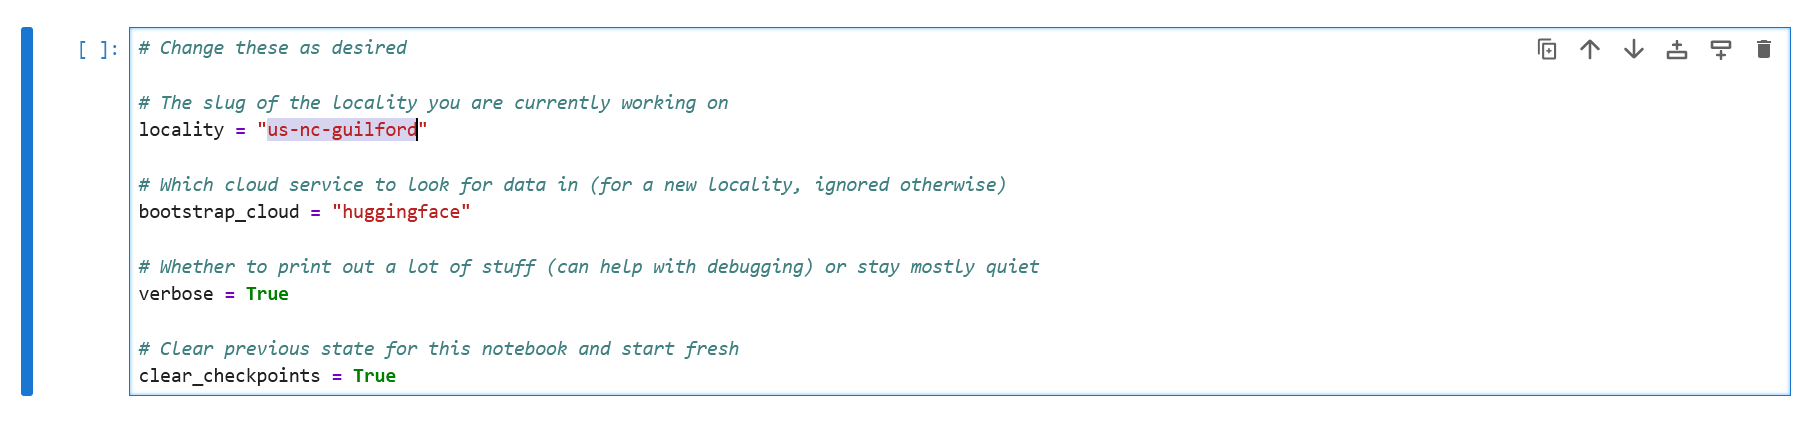
This tells the notebook what locality we're using. With that properly configured, run all the cells from the top, up to and including the one that reads init_notebook(locality):
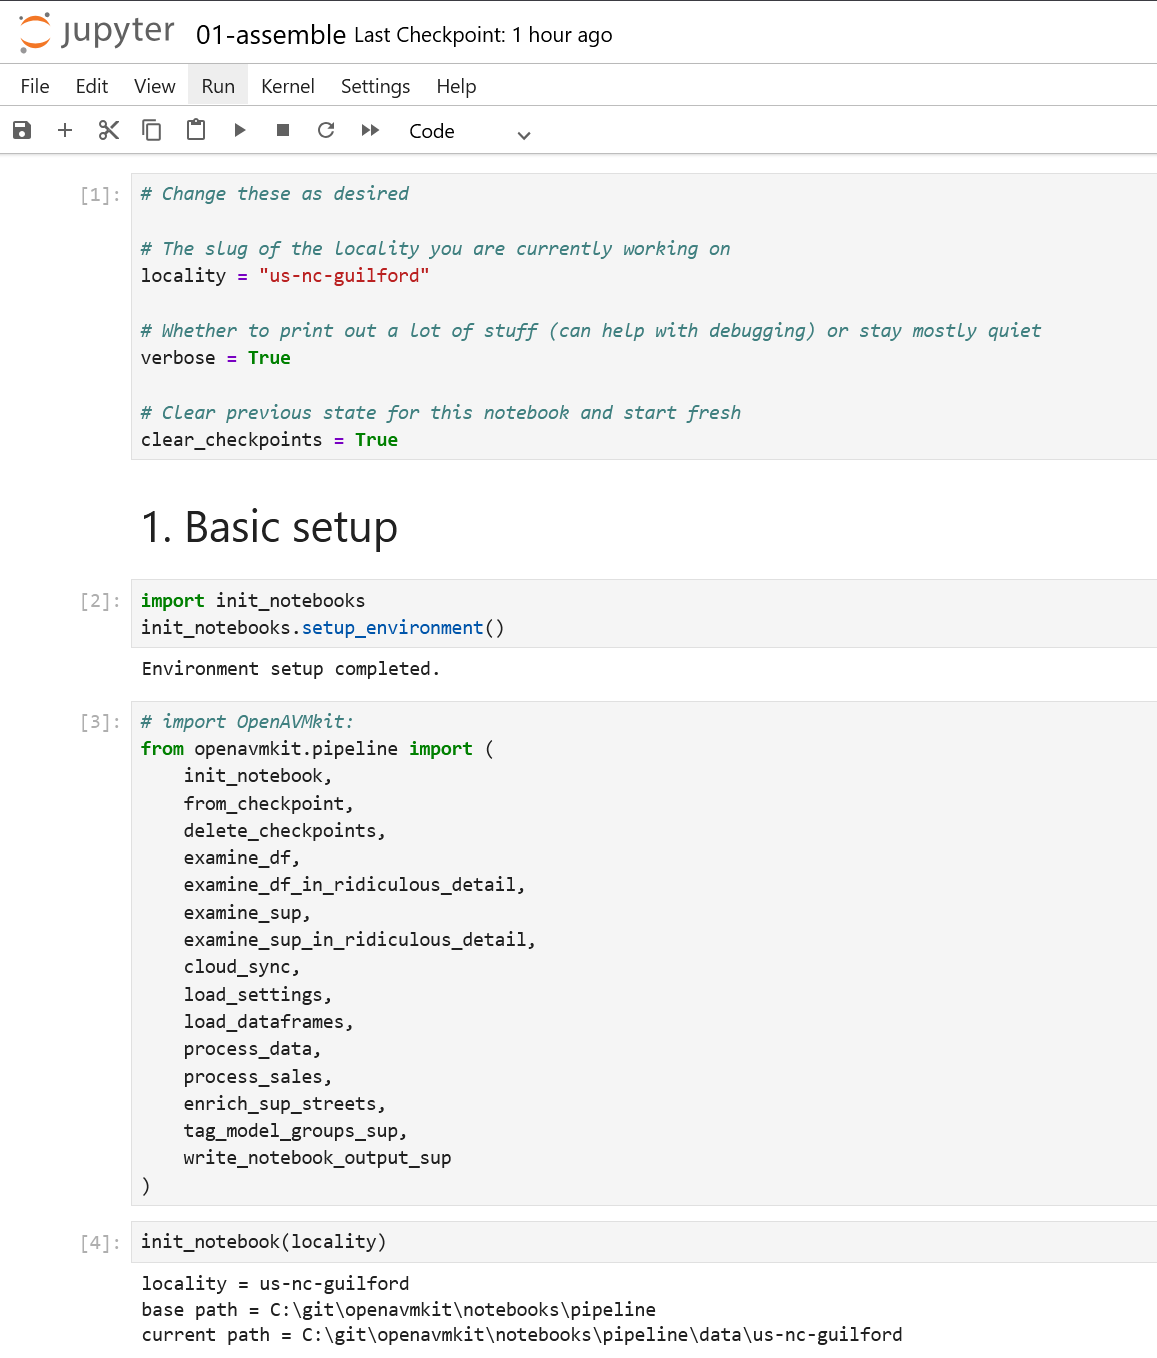
Note that the system has created a folder for your locality on your local disk. The exact location will depend on where you installed openavmkit.
Next, run the cloud synchronization cell:

If you set everything up correctly, you should see a log of all the files being downloaded, and your notebooks/pipeline/data/us-nc-guilford/ folder should now have two folders inside it:
in/--> contains all your input files, includingsettings.jsonout/--> will contain all the output the notebook files generate
Now you have everything you need to run the basic notebooks on the test data! From here you should be able to just run the notebooks themselves.
You can switch between localities by editing the name of the locality variable at the top of each notebook. If you do this, be sure to reset and clear the notebook after changing the locality.
Once this works, you've confirmed your install is healthy and you've seen what a successful run looks like end-to-end. Now go to Build a jurisdiction from scratch — the real walkthrough for onboarding your own data.
Advanced cloud settings
You can use the cloud settings to not just download data from public repositories, but also upload to cloud service containers that you control.
Three cloud service types are supported currently:
- Azure
- HuggingFace
- SFTP
Here is a high level overview of what you must do to connect to your own cloud service:
- Create a file to store your login credentials in
- Add your service-specific credentials to the file
- Point your
cloud.jsonfile at the appropriate service and container
1. Create your .env file
Create a plain text file in which to store your connection credentials. This file should be named .env and should be placed inside the notebooks/ directory within the openavmkit directory.
Notes:
- The file goes in
notebooks/.env, not inside any individual folder insidenotebooks/! - Make sure you don't commit your
.envfile to your repository or share it with anyone else, as it will contain your sensitive login information! (We've already set up a.gitignorerule to exclude this file from being accidentally uploaded anywhere, but make sure you don't override that).
The .env file should consist of key/value pairs, encoded in this kind of format:
KEY=something
ANOTHER_KEY=apples
YET_ANOTHER_KEY=oranges
Here is a short specification of supported key/value pairs in the .env file for cloud sync purposes:
Azure:
AZURE_ACCESS: read_only or read_write
AZURE_STORAGE_CONNECTION_STRING: a string
HuggingFace:
HF_ACCESS: read_only or read_write
HF_TOKEN: a string
SFTP:
SFTP_ACCESS: read_only or read_write
SFTP_HOSTNAME: a string
SFTP_PORT: an integer
SFTP_USERNAME: a string
SFTP_PASSWORD: a string
Save the file and make sure it's located at notebooks/.env in your openavmkit repository.
2. Write your cloud.json file
Here is a short specification of the cloud.json file:
"type": "azure", "huggingface", or "sftp"
Azure:
"azure_storage_container_url": a string, representing a public Azure container endpoint
"azure_storage_container_name": a string, representing a non-public Azure container name
NOTE: if you have a public Azure container configured, make sure the access level is set to 'Container' and not 'Blob'. The former supports list access, which is necessary for OpenAVMKit to use it.
HuggingFace:
"hf_repo_id": a string, representing the identifier of the HuggingFace repository
"hf_revision": a string, representing the revision (kinda like a "branch") of the HuggingFace repository
SFTP:
For now, all SFTP settings, other than setting the type to "sftp", must be configured through the .env file
Instructions on how to setup up accounts/credentials on these services is beyond the scope of this documentation. See those platform's official documentation for up to date details.
3. Syncing the data
Downloading data from a cloud service you control works exactly the same way as downloading from the public test repository that we provide.
The main difference is that if you have your access set to read_write, you will also be able to upload data. To upload data, simply run the
same cloud_sync function in the notebook.
The synchronization function is very simple:
- Files on your local disk not present on the cloud will be uploaded
- Files on the cloud not present on your local disk will be downloaded
- Files on your local disk more recently modified than those on the cloud will be uploaded
- Files on the cloud more recently modified than those on your local disk will be downloaded
That's it. Note that this doesn't handle the case where you've deleted files you no longer need. Deletions will not be synced, so you may need to manually remove files from both locations in order to keep them from coming back next time you sync.